Underfloor heating – it’s just cool

We’re very used to central heating that responds fast when we turn up the temperature. We like our rooms to heat up on demand. With underfloor heating running on cooler water, things are a little different.

Underfloor heating uses water of much lower temperatures than a conventional central heating system. High temperature heating systems run at about 70 degrees C. The water in underfloor heating and low temperature radiators can be as cool as 40 degrees C.

Also, our underfloor heating pipes will be encased in about 20 cm of concrete. It will take a long time for the central heating system to heat up all that concrete and warm up the rooms.Underfloorpipes

That’s part of the point, though. The concrete is a solid thermal mass that will hold on to the heat even when the underfloor heating isn’t on. That means the house will maintain a relatively stable temperature throughout the day and night.

Our heating system won’t be very responsive. If we want to warm up quickly, we’ll need to use our wood burning stove. If we want to cool down, we’ll need to open a window.

The advantage is that it doesn’t take much energy to maintain an even temperature when a lot of heat is stored in the fabric of the house. We’ll be able to keep warm on very little – hopefully just thermal solar topped up with a small amount of wood in winter.

Our heating and hot water will be completely carbon neutral. And that is just very cool.

Heating the house without warming the planet

We hope that we won’t have to heat the Westacre house at all. And if we do, the thermal solar panels should cover most of it.

If all our insulation efforts, and the money we spent on high quality triple glazed windows, work out as intended, our house should be snug throughout the year.

A 16 cm layer of insulation on the outside of the walls, combined with the air tightness we hope to achieve, should cut out any draughts. That should keep all the warmth we generate from cooking, running appliances, and our body heat, inside the house.

Air tightness is great for that, but of course we also need to breathe. We will have to pump fresh air into the house and duct it to different rooms. The air will go through a heat exchanger, sharing the heat of the stale air going out with the cold air coming in. Our heat loss overall should be minimal.woodstack

It’s no guarantee that we’ll be warm enough though. We’ll need to live in the completely insulated house over one winter to work out exactly how much heating is needed.

If we do need to heat the living areas, we intend to do that with hot water from thermal solar panels on the roof. The hot water they generate will go into a heat store, basically a big insulated tank of water that can be pumped around the house when needed. We intend to use it for washing and bathing. And for any heating we need on cold days.

The tricky part, of course, is that when you need heating most, on cold winter days, the solar hot water panels are going to be the least effective. If we find ourselves feeling cold in winter, we’ll use a wood burning stove as extra heating. A stove with a back boiler will also be able to generate more hot water if we need it.

Consequently, we’re building a bit of redundancy into the house. We’re putting pipes for under floor heating into the concrete layer of our downstairs floor in case we need them. We’ll wait and see if we need a wood stove with a back boiler, and how big it needs to be.

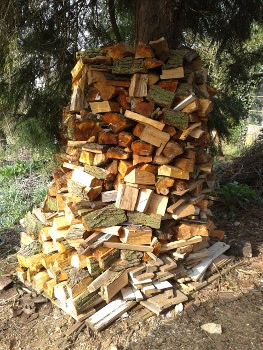
And we’re keeping our eye out for free wood, like the dead alder trees Alex’s dad had removed from behind his house. It took us a fair while to chop them up, transport our share to Westacre, and pile them under the leylandii where they will have to season for a couple of years. We are also growing hazel trees for coppicing in parts of the garden.

Wood is a carbon neutral fuel, but if everyone started heating their uninsulated draughty houses with wood, there would soon be a shortage of trees. Insulating the building as much as possible first ensures that we don’t use more than our fair share of trees.

Insulating under the floor

Insulation is the main ingredient in our efforts to minimise Westacre’s carbon footprint. If we can retain as much heat as possible within the house, we may not have to heat it at all. To get there, we need to insulate thoroughly, including above the ceilings in the loft and below the concrete floor.

We are adding a substantial layer of concrete to the floors downstairs. They will function as a heat store, helping to keep the house warm and the temperature even.

underfloor2

Of course, if you want your concrete floor to be a heat store, it needs to be insulated from the actual cold and damp earth. Consequently, we have to install a lasagne of insulation layers under the floor. When all of it is done, it will look something like this:

The starting layer is the site concrete. In the part of the house we are working on, that’s nearly 90 years old now, and very lumpy. We had to even it out with sand to protect the first layer of our lasagne.

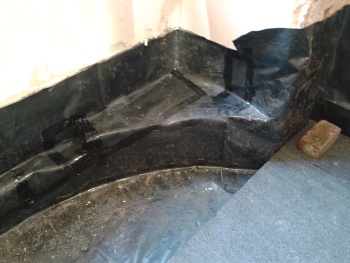
First of all, we put down sturdy black plastic as a damp proof layer. It is glued to the actual damp proof course of the house. And of course, it’s important this is not perforated anywhere. Hence the sand.underfloor1

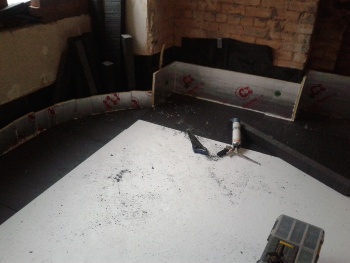
On top of the plastic are three layers of polystyrene, to a total of about 22cm. All of that is edged with thin Celotex insulation boards going a bit higher up the walls. It’s all been foamed in at the edges to keep everything in place.

Next comes another layer of clear plastic for protection.

The concrete layer is next. But we’re adding a few more features to that.

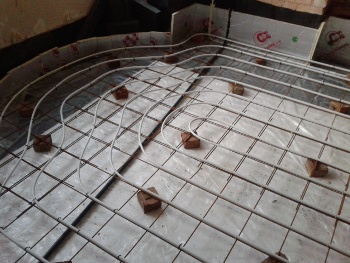
A lot of electrical and date wiring will run through conduits under the concrete. And we are putting in the pipes for an underfloor heating system. As we don’t know how much heating we’re going to need, we intend to be prepared for everything.underfloor3

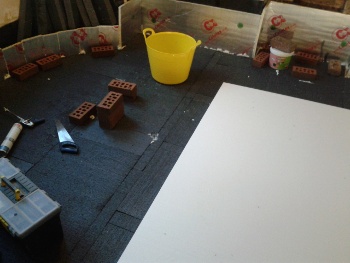
So, on top of the insulation, raised on some bricks, we will be placing a mesh of concrete reinforcement bar (rebar). The underfloor heating pipes are coiled on top of that.

And then we order in the cement lorry. When that day comes, I’ll be sure to get the video camera out. We are hoping for a concrete layer of about 15cm.

The whole thing is levelled off with screed, and eventually we’ll tile on top.

We are investing in staying warm for the long run. When the renovation is finished, we hope to only have to use the underfloor heating on very cold days. It will be fuelled by solar hot water panels, backed up by a back boiler on our wood stove. We’ll only know how well that has worked when the whole project is finished and we’re living in it.

Insulating the loft

This last week or so, Alex has started constructing a floor in the loft. When it is finished, we will be insulated from the cold by a lasagne of many layers.

The ceiling will be made of ordinary plasterboard. We’re not just attaching it to the bottom of the joists, though. We’re raising the ceiling a little by putting the plasterboard half way up the joists.

Above the plasterboard, we’re having a cosy layer of non-mineral insulation wool.

Next is the OSB floor that is being installed right now. It is tongue-and-grooved on four sides, so it fits together tightly. Any gaps are filled with the black sticky stuff that we’re also using on the external wall inslation.

On top of the OSB we’ll be putting 15 cm of Celotex insulation foam. Around the edges, where the roof comes down low, there will be woollen insulation instead.

And finally, on top of the Celotex, we’re putting a layer of thin plywood. We will need to be able to walk around in the loft, as it will be the nerve centre of our house, with lots of pipes, cables and ducts leading off in all directions.

We are doing this work now, so that we have something more than just plaster board, floor boards and roof tiles separating us from the frosty night air. It should instantly give us some more warmth in our temporary flat.

Extending the rafters

One of the many processes we’re going through in the Westacre renovation project is making rafter extensions. It involves a lot of careful measuring and sawing.

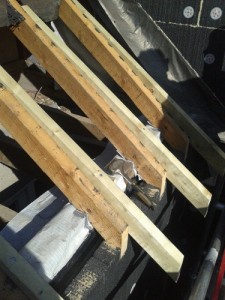
We’re installing external wall insulation, hoping to get our 1930s semi to near passive house standard. It is making our walls 16cm thicker. And that means the roof needs to be extended on all sides to cover that thickness.EWIRafterExtensions

Where the rafters come down to the wall, we have to make them longer. We’re also kicking them out slightly so that making the roof wider doesn’t also mean making the eaves lower, which would cover the tops of some of the upstairs windows.

Because this is a renovation, we have to work with the existing building. Working on some of the earlier rafter extensions, we noticed that just making identical pieces of wood does not make for a straight roof edge. Evidently, the angle of the roof isn’t uniform.

So in the section we are currently working on, we have had to make some extra measurements.

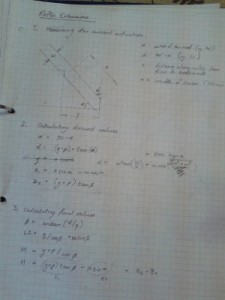
We measured the horizontal and vertical along the joists, so that we could calculate the angle of the roof at each of those points. The angles varied from 31.2 to 32.5 degrees. Over the length of the joist extension (132 cm), that makes quite a difference.calculations

Alex fed the numbers into his computer. It calculated the equations and told us the exact angle of the birds mouths in the rafter extensions, and the height of the blocks that they will rest on. We meticulously measured those out on the wood and tried to cut them as precisely as possible.

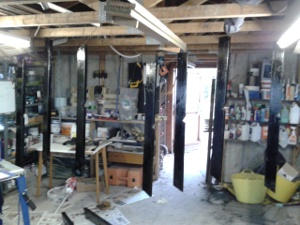
The next step was to paint the rafter extensions black. We’ll have to protect the wood somehow, and we’ve decided that black wood against the black roofing felt will probably look better than very blonde pine. It’ll also hide a multitude of sins going on under the eaves.

We hung the rafter extensions from a wire in the garage for easy access and painted them with bitumen paint. That was a sticky couple of hours for Hilde and Roger, Alex’s dad. Sometimes we’re very grateful for small mercies like rubber gloves.blackrafterextension

When we get back from Belgium, we’ll be nailing the blocks and rafter extensions into place. And then we can finish insulating that long wall. That’ll complete roughly 2/3 of the external wall insulation. We’ll be waiting for more clement weather to do the remaining third.

The Westacre Project – looking back at 2014

It is a truth universally acknowledged that big projects never go the way you expect. Ours is no different. But we have done some great stuff in 2014.

The year took a while to get started. The winter was mild but relentlessly wet. In the early Spring, it did stop raining, and we started preparing for the great work of insulating the house.EWIWhiteSheet

Installing external wall insulation doesn’t start where you expect it to, though. Why you would make a substantial raised vegetable bed in order to insulate a house isn’t exactly obvious.

It’s because of the earth works. You need to insulate right into the foundations to below the level of the insulation under the floor. So we had to dig out all the foundations. The spoils of the digging works were transferred into the raised vegetable bed. Which is as huge as we could make it, but still nowhere large enough for all the soil we dug out.

And of course, once you’re digging, you may as well dig the path we are going to have all around the house, with the help of a posse of friends. It was a good idea to have the paths ready, so the scaffolding we’d need for installing the insulation would have something level to stand on. And while you’re doing that, you may as well dig the trenches for the drain pipes around the house. No use filling in the path and then having to dig it up again another time.

Consequently, the first half of the year was taken up with earth works of various kinds. We finished the raised vegetable bed with sturdy timbers and

- dug out the foundations.
– spray-insulated the foundations.
– uncovered drain pipes.
– dug out pathways around the house.
– created new trenches for new pipes.
– laid the pipes and connected them up with the existing ones.
– made foundations for the balcony we’ll eventually build.
– filled all the trenches in again.
– covered over the new pipes complying with the building regulations.
– created brick edges for the paths.
– filled the paths with gravel.

And only after that were we ready to start putting insulation on the house. Which requires a lot of measuring and cutting of polystyrene. And a lot of drilling holes and hammering in fastenings. And because we’re particular, we are also filling any gaps with expanding builders’ foam.

Of course, the polystyrene makes the walls 16 cm thicker, so we also have to extend the roof in all directions. We extended verges by adding an extra rafter, and eves by lengthening the rafters. A lot of meticulous measuring and cutting.

The insulation is not just polystyrene, though. Far more is going on underneath.

- A vapour barrier, custom tailored for the house.
– The wall around each window carefully smoothed out with crack-free render.
– Then the gap between render and window frame filled with a fibrous filler.
– An airtight membrane with a rubber gasket pushed into the window frame.
– Membrane glued to the wall.
– Vapour barrier glued to the membrane.

Hopefully, all of that will make the result pretty air tight.

By now, a few days after Christmas, we have covered just over half the walls with external wall insulation. And some of that has been covered with render by our plasterer. At least we have some idea of what the place is going to look like.

A few other jobs got done as well:

- Steel I-beam installed to replace the partition that was holding up the roof.
– Floor in the old kitchen and dining room taken out.
– Floor boards used to make a new wood store.
– Ceiling joists in the big room upstairs replaced with bigger, better ones.

It feels quite satisfying looking at it all like that. We have worked hard and achieved an awful lot.

Not according to plan, of course. If all had gone the way we imagined it, we wouldn’t have done most of this year’s work ourselves – or even at all. For one reason and another, these jobs added themselves to our list. That has slowed us down quite a lot, but we have learned so much in the process.

We’re having a rest now. And who knows what adventures we will have in the year to come…

The domino house: external wall insulation

This year, we have dedicated our lives to making our house as energy efficient as we possibly can. We have chosen to retrofit our ordinary house from the 1930s with external wall insulation. The aim is to get as close to a passive house standard as possible.

This is not an easy thing to do. It would be far more practical to build a new house to a high efficiency standard and be done with it. Retrofitting involves a lot of fiddly work. And because the rest of the house is very much attached to the walls, things get in the way. We’re doing it because we love this house and because we can.

The gold standard for insulation involves insulating right down to the foundations of the house.EWIcanisters We had to dig down far enough to reach them.

We covered the foundations in a spray foam that comes in two canisters. The two chemicals mix in the spray nozzle and turn into a hardened foam within seconds. Since we were doing whole walls at a time, Alex did the spraying while Hilde followed him closely with a wheelbarrow containing the two canisters.

The next job was to make the joins between the windows and the wall air tight. Our new windows are state-of-the art triple glazed, and well sealed. It would be a shame to lose heat through the cracks around them.EWIWhiteSheet

The process started by repairing the wall where the window replacement had left an uneven surface. This was mostly done with cement render, but touching the window frames we used a fibrous filler.

Modern windows of that type are built with a small slot on the edge of their frames. This slot is there to receive the gasket that is attached to an airtight membrane. The job here was to painstakingly insert the gasket into the slot to make the seal. The membrane was then glued to the wall with black silicone glue. Most of this was Hilde’s job.EWIDominoWalls

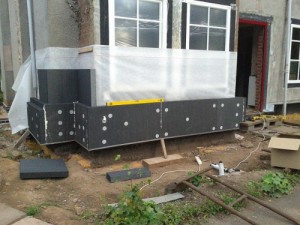
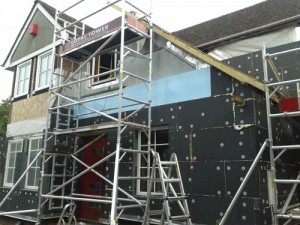
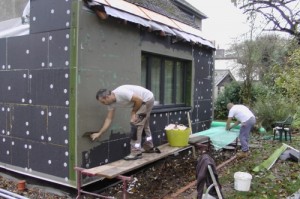
The main event of the insulation project is covering the walls with polystyrene boards. We are using 8 cm thick boards of expanded polystyrene with anthracite, which is more insulating than the ordinary white stuff. We are fixing the boards to the wall in two layers, three on the North facing wall.

The polystyrene is attached to the wall with special plastic fixings. Metal is not suitable, as it would provide a ‘cold bridge’. When the screw gets cold, it conducts the cold into the wall and reduces the efficiency of the insulation.EWIFixings

For each fixing, a hole is drilled and filled with expanding foam. Then the plug part of the fixing is hammered in, followed by the plastic spike that holds everything in place. The white fixings on the black boards do look like domino pieces. Virtually every visitor comments on the look, which is, thankfully, temporary.

Underneath the polystyrene, a vapour proof barrier provides the airtight layer. It’s a thin sheet of white ‘breathable’ plastic. It has to be carefully layered together and detailed around the windows, so that no air can get trough. Every tiny leak will make all the work we have done less effective.

The air tight barrier is also carried on over the top of the walls and into the loft. There, it will be joined with the loft insulation, using more of that spray foam from the two canisters.EWIRafterExtensions

In order to get the vapour barrier into the house, we need to take the edge of the roof off. And while we’ve got the tiles down, we are also extending the eaves of the roof to cover the walls, which are now, of course, more than 16 cm thicker than they were. Alex is practising his carpentry skills: measure twice, cut once.

We have employed a professional plasterer to render over our dominoes. The final look very much depends on the smoothness of the finish. There is no way we amateurs could do it justice.

Our plasterer has covered a few walls now, and we are getting an idea of what the finished product is going to look like. We can’t wait for the colour coat to go on. That will (hopefully) improve the aesthetics, and also provide a protective, self-cleaning outer layer to our insulation.EWIRender

All of this is still ongoing. We have completed some of the walls, but more needs to be done. We’ll be working on the roof and the insulation into the winter, as other things depend on certain parts of it being finished.

We’ve pretty much been through all the steps once, though. Hopefully things will go smoothly and we’ll be able to show you what the house will look like pretty soon.

Froth Pak for the foundations

It finally feels as though our renovation adventure has properly started. The first few square metres of our walls are covered in insulation. The process of insulating the foundations is simple but labour intensive.

In order to give the house a good air tight envelope, we need to insulate the outside wall past ground level down to the concrete foundations. We will also be putting insulation boards underneath our new concrete floor when we start work indoors. Leaving the foundations bare would create a cold bridge that would compromise the effectiveness of the floor and external wall insulation.

The first step in the process is to dig a trench a couple of spades deep by the
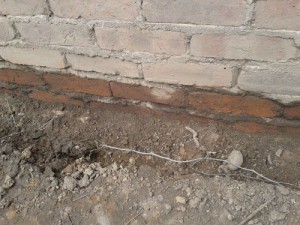
Trench dug down to the concrete foundations.

Trench dug down to the concrete foundations.

outside wall of the house. While we’re at it, we’re changing the way the drain and waste pipes are configured, ready for when we build our new bathrooms. We are also laying a path all around the house to keep vegetation away from the relatively vulnerable EWI. Lots of digging required, but we’re up for it, with a little help from our friends.

Having revealed the brickwork below ground level, we took a stiff brush to it to remove the last bits of earth. This gives the spray foam the best chance of adhering to the wall. Next, we
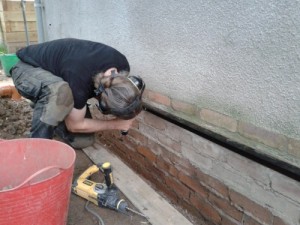
Attaching the plastic edge to the wall.

Attaching the plastic edge to the wall.

screwed an L-shaped plastic profile to the wall, just underneath the damp proof course, marking the top edge for the insulation foam. It turned out that this really helps to keep the edge clean and the foam away from the damp proof course.

Then came to fun part: spraying the Forth Pak foam onto the wall. We are using a product called Froth Pak, which comes in two canisters, red and blue. The two products combine in the spraying nozzle. Once they are mixed, they harden very quickly to form a hard coat on the wall.

Froth Pak comes with some very specific instructions. You need to attach the tubes to the
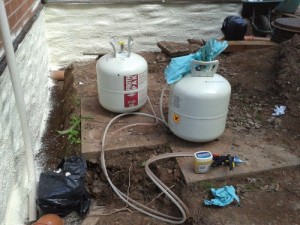
Froth Pak canisters with tubes, nozzle and vaseline

Froth Pak canisters with tubes, nozzle and vaseline

canisters correctly, blue to blue and red to red. The disposable nozzles are clipped in with some vaseline. This keeps the trigger nice and clean. Once you start using the nozzle, you can’t stop for more than 30 seconds before the combined products start to harden inside and you have to throw it away and attach a new one.

Because of that, we put the canisters in a wheel barrow they could stay close to the person spraying. the tubes are about 3 metres long, which is shorter than our walls. We managed to keep going quite smoothly that way, even though the route took us from one side of the house to the other, via some dug trenches.
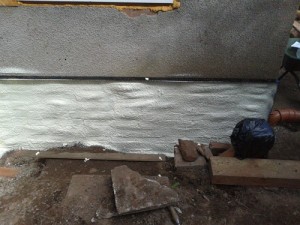
Our first coat of insulation.

Our first coat of insulation.

At our first go, we didn’t know how frothy the product would be, so we ended up

with a coat that was too thin. We learned that you can’t go back over a bit you’ve recently done, as the new expanding layer will pull the layer that is already hardening off the wall. If you need a second coat, you need to give the first coat some time to harden completely.

Unfortunately for us, the second coat had to wait. As we opened the valve on one of the canisters for our second go,
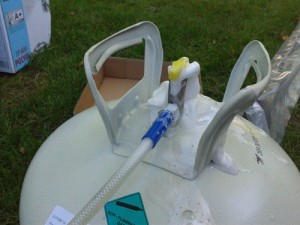
The blue canister developed a leaky valve. This isn't supposed to happen.

The blue canister developed a leaky valve. This isn’t supposed to happen.

foam started frothing out of the valve. That’s not what was supposed to happen. We took the faulty canister back to the shop. Thankfully they were very understanding and helpful and gave us two new canisters. Apparently this fault is rare but not unheard of. The second coat went on smoothly after that.

Finally, we painted the top 30 cm or so of our foundation insulation with bitumen paint, to weather proof it. This is the bit that will stick out above ground level, so it needs some
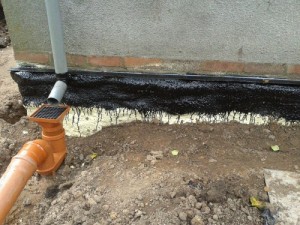
The finished insulation. Our path will raise the ground level further.

The finished insulation. Our path will raise the ground level further.

extra help. We soon worked out that a daub of diluted PVA is needed to help the bitumen paint stick to the shiny surface of the insulation.

We have done about a third of our foundations. With a few more days of nice

weather, we should be able to finish.

Next, we’re getting ready for scaffolding. Watch this space.
Playing with pipes


You’d think that digging a trench all around your house in order to insulate the foundations would be a simple, self-contained task. All it needs is a bit of persistence and a spade. Well, as it turns out, it’s a bit more complicated.


Because, of course, once you get digging, you come across all sorts of things that cross the boundary of the building at about the level of the foundations. Like waste pipes, and drain pipes from the roof.


And then you realise that, far from being a self-contained task, you have to think about where all those pipes are going and what the final design for the whole network is going to be. Which is why you need to think about the design of your bathrooms, that aren’t going to be built for another year or so.

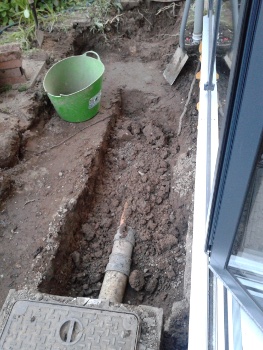
The original inspection chamber and waste pipe by the patio window.

The original inspection chamber and waste pipe by the patio window.


The main waste pipe for the toilets in the house comes out of the foundations under the patio doors at an angle that isn’t quite 45 degrees. From there, it leads into a brick built inspection chamber. If we weren’t living in the house, we could just demolish that, forget about the old pipe, and just plan for the straight pipe that will come from further along the wall. But we are going to need that old waste pipe for a while.


So we are replacing the brick built inspection chamber with a new plastic one. They are compact, easy to deal with, and quick to install.


But of course that is not the end of the story. The waste pipe from the new downstairs toilet has already been installed. It goes to another inspection chamber, closer to the front of the house, where it joins with the waste pipe from beneath the patio window.


The pipe for the downstairs loo was never quite right. It always had too much of a drop to it, which waste pipes aren’t supposed to have. They need to be either close to horizontal, or completely vertical. Anything in between won’t quite work.


Alex is, therefore, digging out the second inspection chamber as well, so he can turn it slightly, which will make the run along the wall straighter and will give him the opportunity to improve the position of the pipe from the downstairs loo.


On top of that, of course, we need to also consider down pipes from the gutters, and where the soak-aways for those are going to go. Nothing is ever simple.