How to remove a wasps’ nest

We’re finally seeing some progress on the Westacre renovation project. This is what has happened in the last week or so:

– Our house has been measured for new windows.
– Alex has started some demolition in the hall and dining room area.
– Some re-wiring was done, because the original was not exactly to spec.
– A sheet of asbestos was found to make up the ceiling in the porch.
- There was a wasps’ nest in the roof space above the asbestos.

A wasps' nest, not unlike the one that was in our porch.

A wasps’ nest, not unlike the one that was in our porch.

Trying to take asbestos down is bad enough without a colony of wasps getting all annoyed at you for threatening their home. And while we would love for all creatures to be able to live and thrive in their own way alongside us, wasps right inside an area where Alex needs to work is just not an option.

Clearly, we had to take drastic measures.

Alex found a couple of great resources on the internet, telling him exactly what to do about the wasps:

WikiHow Get rid of a wasps’ nest: a step by step guide on how to proceed.

And a how-to video:

Some pro tips:
– Wear protective clothing to protect your hands, face and neck.
– Do the procedure in the evening, when all the wasps are in the nest.
– If you have to use a light to see what you are doing, put it somewhere away from you. You don’t want the insects to get attracted by the light from the torch in your hand.

I’m glad, and sad at the same time, to report that the procedure was a success. The porch ceiling was dismantled without any wasp-related misadventures.

Do you know of a better way to remove a wasps’ nest? Something not involving nasty chemicals, perhaps? Please do share your insights below.

Making an ugly house look good

Let’s not mince words here: Westacre’s house is ugly.

I fear it may well have been quite a smart 1930s house before Alex’s parents got their hands on it. They were the ones who replaced the rounded bay windows with a square bay. They bricked up the original front door. And they decided that the grey Tyrolean render was a good idea.

What do you think?

Westacre as it looks now.

Westacre as it looks now.

We would like to remodel this frontage and make it look better. We are aiming to take the design about 25 years further into the past. We’re going for Edwardian smart.

Of course, you can do things to a house and you’ll only really know what the result looks like when you have spent all the money on brickwork, new windows, a modified roof and insulation. To give ourselves some sort of idea, Alex has spent a few days working on a photoshop pre-visualisation of what we’re aiming for.

As you can see, we will be putting the front door back where it used to be. The house instantly looks more comfortable with itself. We are also going for smaller windows. Not just because we like them better, but also because this is the NW side of the house, that gets all the nasty cold and wet weather. Smaller windows will help us keep it warmer.

An impression of what we're aiming for.

An impression of what we’re aiming for.

If you compare the two pictures, you will also notice that everything looks a little wider. This is because of the 10 cm thick external wall insulation we will be installing. We’ll also have to extend the eaves of the roof a little, to accommodate the insulation panels.

With some nice windows and tiles making a feature out of the pointed gable, we think it looks quite smart. The porch across the front gives it some added romance and will also keep callers dry. I can just imagine myself sitting in a rocking chair out there, watching the sunset.

Sheep’s wool vs. phenolic board: How we made the choice

Our concern about climate change have led us to an ambitious project. We intend to move our 1930s house into the 21st century by massively reducing its need for active heating.

The main part of this project is improving the insulation. We plan to envelop the entire house in a layer of external wall insulation that keeps the heat inside. For this job, we will use 10 cm thick phenolic insulation board.

You may ask: if you are that concerned about the environment, why are you using a man made material? Why aren’t you going for something natural, like sheep’s wool or straw?

Does it make sense to use a material that ultimately derives from crude oil? Well, for us it does.

Our main restraint is that this project is a retrofit. We are adapting an old house for the future. If we had the means to start from scratch, we probably would choose different materials. As it is, we have a 1930s house that loses heat through its solid brick walls. We need to find a solution that works for us.

The speed at which heat is lost through particular materials is measured in U-values. On average, a solid wall (which is how the main part of the house is built), has a U-value of 2.1. Newly built house walls nowadays have a U-value of 0.3. We are aiming to go better than that, to about 0.23.

What would we have to do to get to that value for different materials?
- phenolic insulation board
- sheep’s wool
– straw bales

1. Sheep’s wool

Wool works best layered between structural elements. (image from www.greenfsonline.co.uk

Wool works best layered between structural elements. (image from www.greenfsonline.co.u

I love the idea of wrapping my house in a nice warm woollen blanket. Natural materials certainly have an appeal, and for some projects, wool would be the right choice.

For retrofit external wall insulation, however, sheep’s wool isn’t practical. This material works best when it is sandwiched between two structural walls, like the two parts of a cavity wall. We would have to somehow attach the wool to the outside of the existing wall, and then build another structural wall outside that.

The U value of 10 cm of wool is 0.42. In combination with our solid brick wall at a U value of 2.11, that brings us to a total of 0.35, which is above the value we’re aiming for. We would have to make the insulation twice as thick to come to our ideal value.*

2. Straw bales

The advantage of straw bales is that they are structural. In other words, you can build a wall with them and it will stay up. It is a great material to build new structures with, as it also has a high level of air tightness. If we were to start from scratch, this would probably be one of our materials of choice.

However, to get to our ideal U value of about 0.2, we’d need to wrap the house in straw to a thickness of 40 cm. That is rather a lot of straw and would give us very thick walls. We would have to extend the eves of our roof quite a long way to cover this.

3. Phenolic insulation board

Phenolic insulation board is light and easy to work with

Phenolic insulation board is light and easy to work with (image from cheerforeduct.en.ec21.com)

Phenolic board is extremely light and easy to work with. So much so, that we are intending to do this part of the installation ourselves. Covered by a mesh and a special render, it is also very durable and flexible.

We will only need 10 cm of phenolic board to come to our overall U value of 0.23. This is a better standard than modern newly built houses.

We calculate that this will be enough to cut out gas central heating all together. With luck, we’ll be able to install the insulation, and the new windows, this year. We need to live with it through the winter to find out how much heating we will actually need.

Here’s hoping that solar hot water, a wood burner, and phenolic insulation board will keep us cosy even in freezing temperatures.

Have you made similar choices? What worked for you? Please share your experiences in the comments below.

*To find out how U values are calculated, click here.

How to insulate your house and cut heating bills

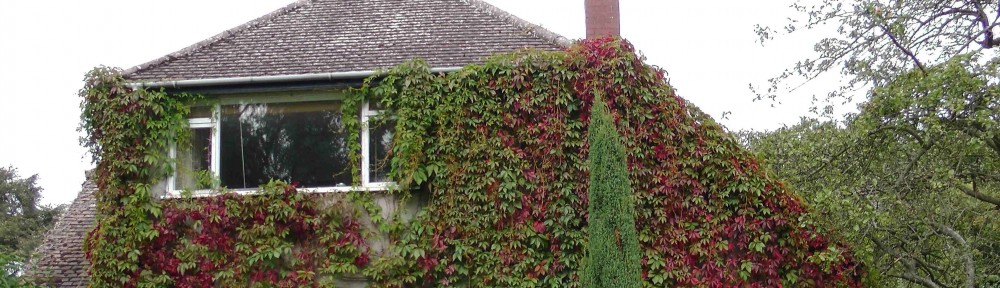
Phase 2 of the Westacre Project is to insulate our 1930s house well enough so that we no longer need gas to heat the house. If all goes well, we should barely need any heating at all.

We have been thinking about and planning this phase for a long time. Retrofitting an old house to significantly reduce its carbon footprint is a complex issue. This will be the most important – and most expensive – part of the project.

The aim is to minimise heat loss. The speed at which heat is lost through particular materials is measured in U-values. On average, a solid wall (which is how the main part of the house is built), has a U-value of 2.1. Newly built house walls nowadays have a U-value of 0.3.

We are trying to end up somewhere in between, hopefully close to the modern standard. To help us achieve this, we have to make the choices that will work for us and for our house.

Here is an overview of the decisions we have made, and our thinking behind it. We hope it will help you as you think through changes you could make.

1. Windows
The first part of the project is to install high quality windows and doors. They will help significantly to cut out draughts and heat loss through the glass.

We are going for aluminium clad UPVC. It’s not the ideal solution, but unlike wood, UPVC fits in our budget. We’ll also avoid having to paint or treat the wooden windows.

The aluminium cladding on the outside will extend the life of the UPVC, so hopefully they won’t have to be replaced for several decades.

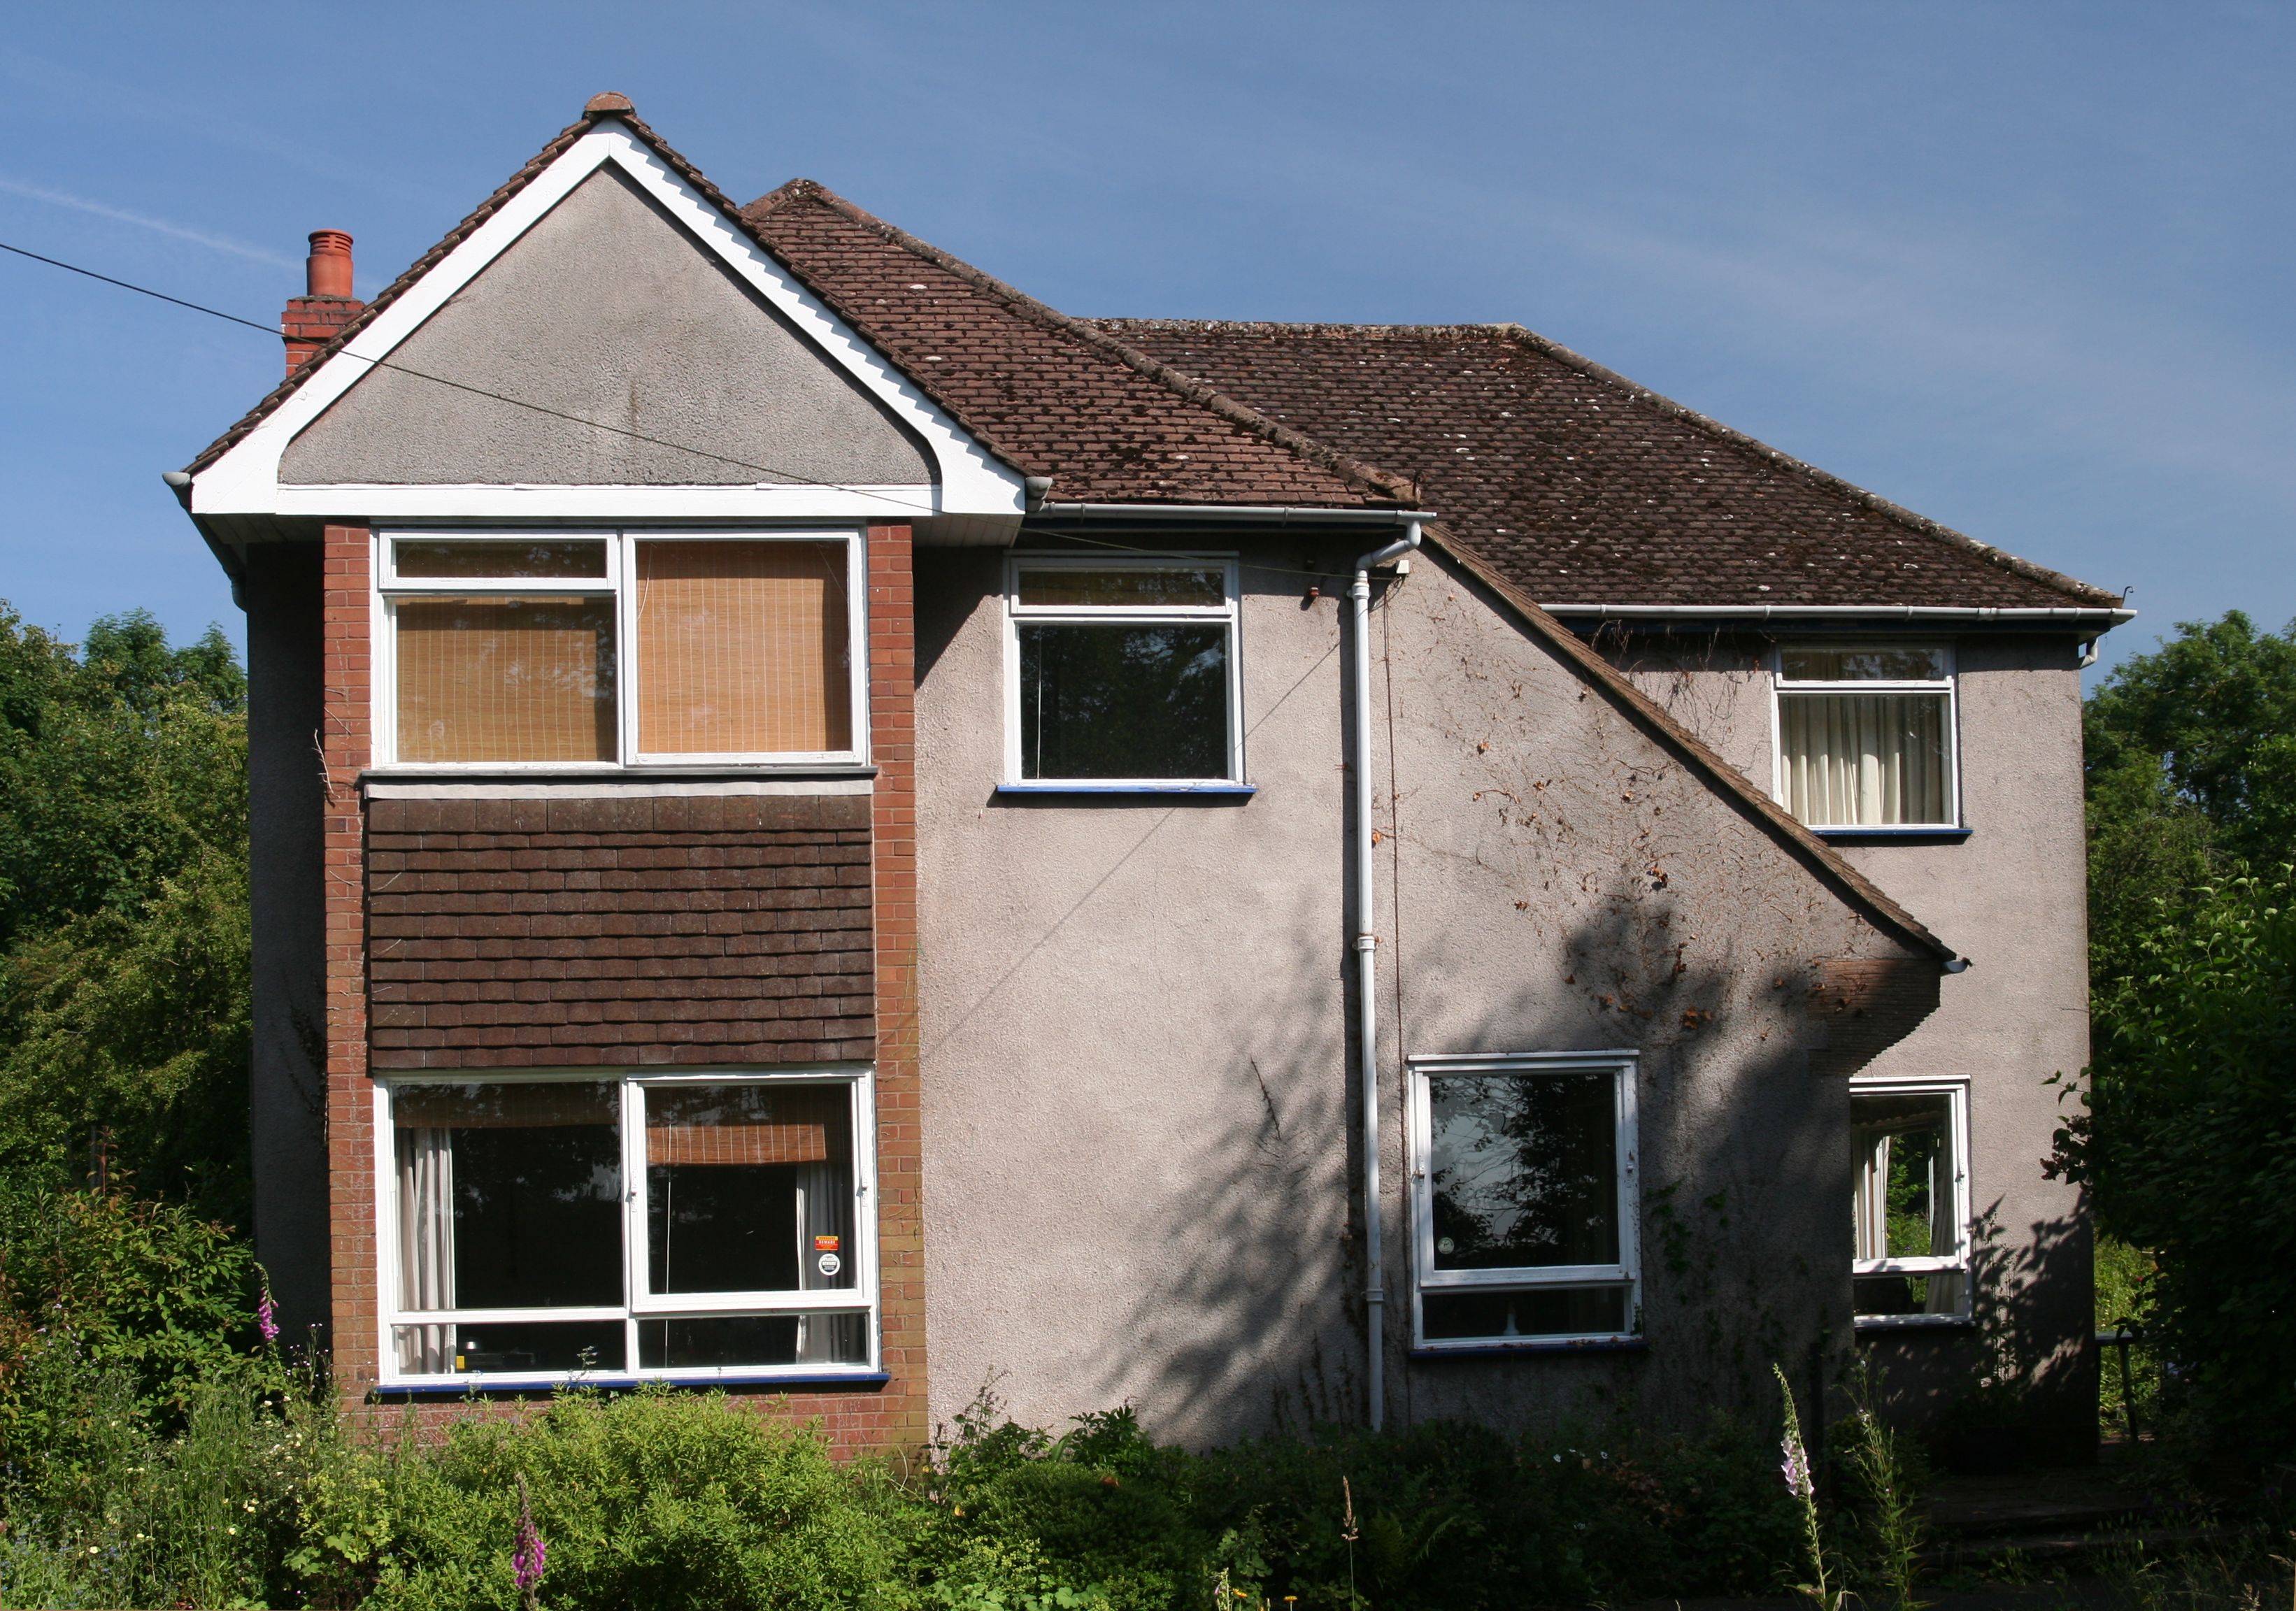
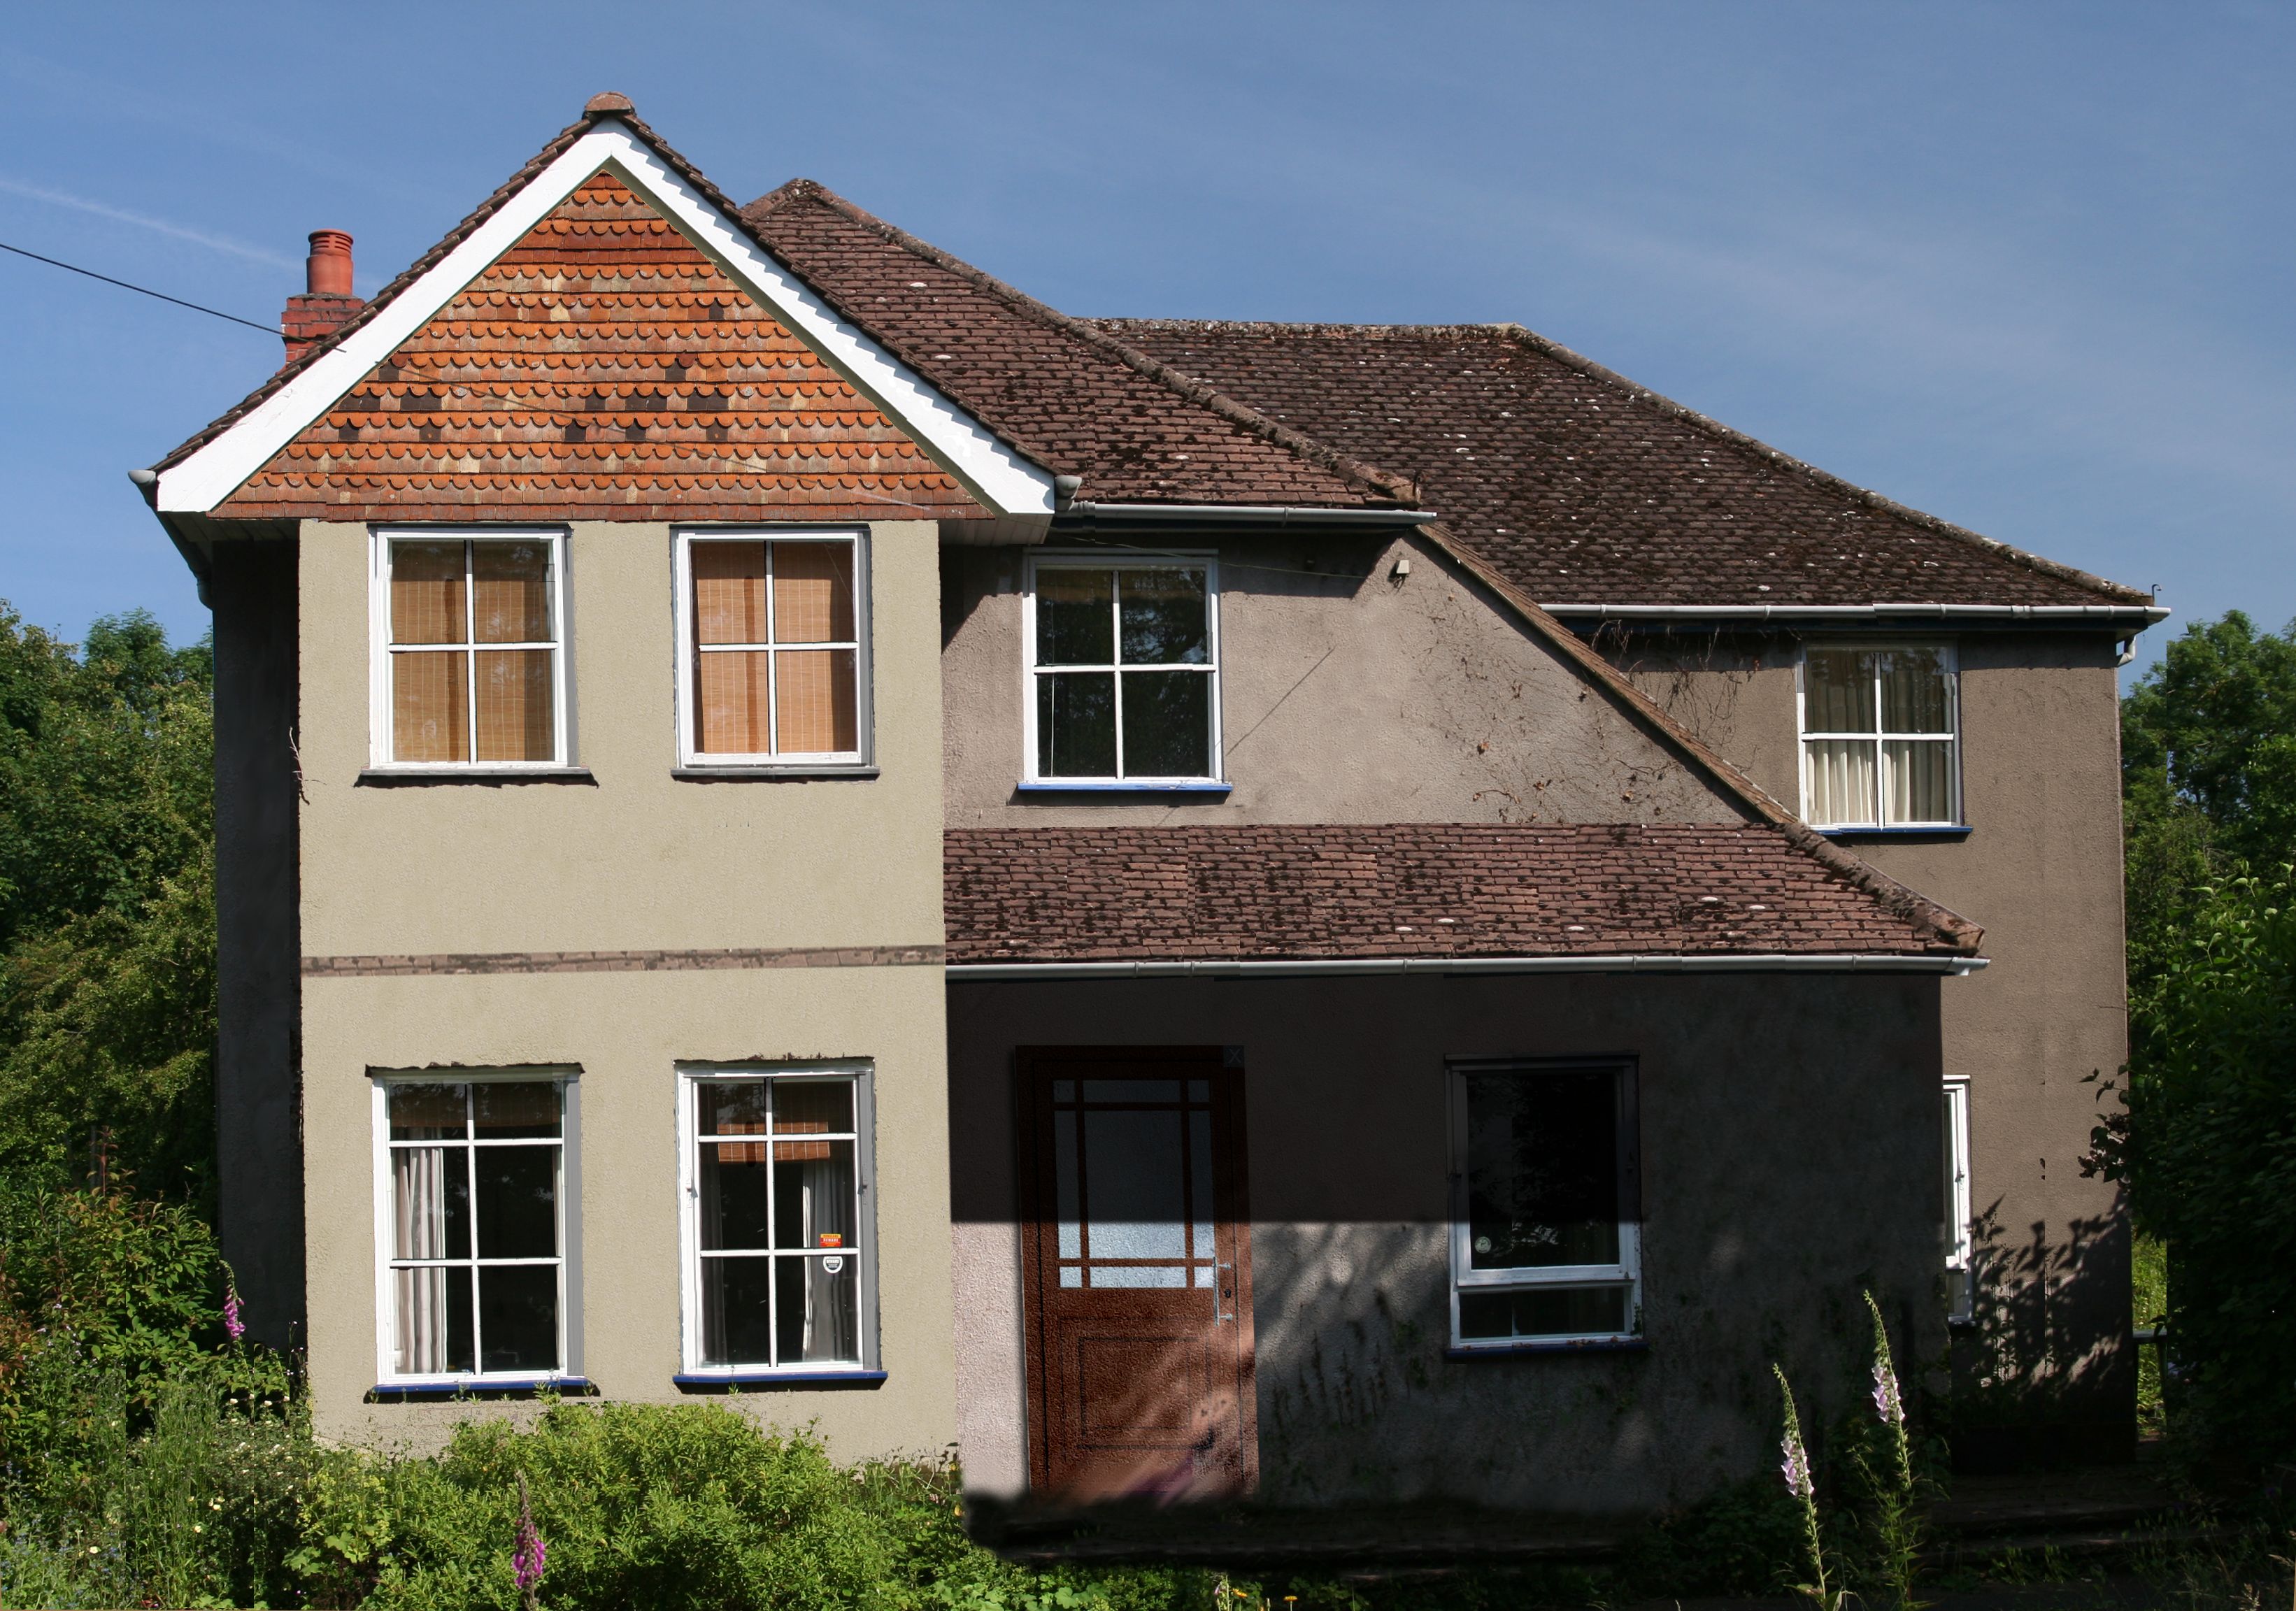
We will reduce the window openings at the front of the house, and use triple glazed windows there. The house faces North West, so that side is coldest and gets all of the weather. Smaller windows and triple glazing will help the rooms at the front stay warmer.

On the sunny side of the house, the windows will be double glazed. Triple glazing not only keeps out the cold, it also keeps out the heat of the sun. We want to make use of solar gain to heat the house as much as possible, so thinner glass will help there.

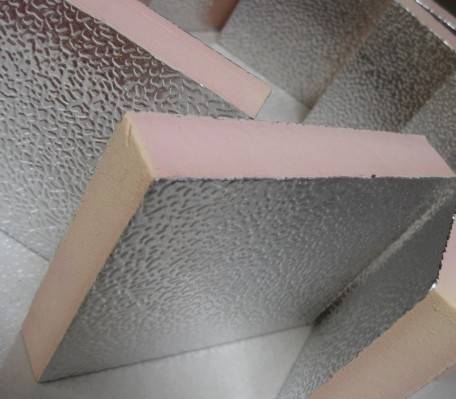
2. External wall insulation
The old part of the house is built with a solid brick wall, which also loses heat. The only practical way to improve its U-value is to install external wall insulation.

We will be cladding the entire outside of the house with 10 cm of phenolic insulation board. It is finished off with a smooth render.

You can add different finishes to your external wall insulation (from www.minsteronline.co.uk)

When installing this insulation, it’s important to envelop your entire living space. Any cracks or cold bridges in the insulation will cause condensation and possible damp problems inside the house.

This means we’ll have to make sure the insulation goes down to the foundations of the house and links up with the loft insulation.
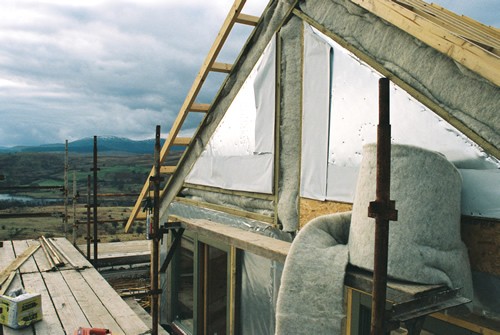
3. The roof
The external wall insulation will make our walls about 12 cm thicker than they are now. To accommodate this, we will need to extend the eaves of the roof.

The bottom few courses of tiles will be taken off, and the joists kinked out slightly so that they extend further, but no lower, than they do now. We are going to need to hire some scaffolding for that job.

At the same time, we’ll also have to modify the roof insulation in a couple of areas where rooms are directly under the roof. An insulated roof space that doesn’t have adequate ventilation is liable to get condensation between the tiles and the insulation.

4. Ventilation
All of the above should give us a very well insulated house with a minimum of heat loss. On the other hand, the insulated envelope will not let in much fresh air, so we will need to provide ventilation.

We have calculated that air exchange through ventilation would be our next biggest source of heat loss. So we intend to install a heat recovery ventilation that pre-heats the cold air coming in.

The system blows out the stale, warm air from inside and sucks in fresh, cold air from outside. The two cross over in a heat exchanger, where the warm air slightly heats the incoming cold air, so the house stays warmer.

Once all this is installed, we’ll have to live with it for a while so that we can work out exactly how much heating we will need. You can make complicated calculations based on theory, but the real proof of the pudding is experiencing how warm it actually feels.

We hope to be able to entirely cut out gas central heating, and warm our house with solar hot water and a wood stove with a back burner. But that is a different story.

More information on home insulation from the Energy Saving Trust is here.

For daily updates and inspiring links, follow us on Twitter.


Finishing Phase 1

Settling everyone into their new homes has taken a long, long time. Much longer than we ever anticipated. One way or another, we got delayed and exhausted. And on occasion distracted by projects that need doing and require less intricate logistics.

We’re coming out the other end of the exhaustion, though, and ready for the next part of the project.

Here is how Phase 1 went:

1) Finish renovating the bungalow
It took us until the end of February to finish renovating the bungalow to an acceptable standard. But it got done, with walls painted, carpets and wooden floors down, and all the amenities in working order.

2) Move Roger’s furniture and belongings into the bungalow
We had a number of mini adventures doing this. Some bits of furniture had to come downstairs, and we wondered how they ever made it up there. Roger also re-used a carpet from Westacre in his bungalow. This involved passing it out of the 1st floor windown, transporting it on the trailer, and having the professionals lay it in the bungalow. Nobody was hurt, but one light fitting didn’t survive the passage of the carpet through the bung.

3) Let the house in Harrow
When we had moved Roger to the bung, we were ready to go and empty our Harrow home at a leasurely pace. Just then, the agents let us know that the place had been let and we had 10 days to move everything out. We managed, and our tenants moved in and started paying rent. Which is brilliant.

4) Move Alex and Hilde’s furniture and belongings from Harrow to Westacre
We moved our furniture up the M40 by trailer. And we had to do it fast due to the tenants moving in at relatively short notice. It took 6 journeys. Thankfully we found a friend to help us with the heaviest pieces. Thank you Matt!

5) Find new homes for things that are no longer wanted
We tried hard to find someone who had both the time and the patience to help us with this. We failed. In the end, we loaded most of it onto the trailer and took it to a car boot sale. This was a very successful exercise in getting rid of unwanted possessions, and we made some money too. We’re very glad we waited for a nice sunny day, when there were lots of people out for a bargain.

The car boot sale

6) Turning the Westacre living room into a bedsit
We’d been sole occupiers of Westacre for a couple of months before we finally moved into the bedsit. The biggest job was constructing a makeshift kitchen in one corner of the big room. Alex had weeks of fun with electrics and plumbing. It looks very nice from inside the room, but the plumbing going through the (now hidden) kitchen door on the other side of the wall is a bit Heath Robinson. Still, it works. Just a lick of paint on the new partition, and it’ll look like we meant it.

Just a few days ago, we took the first step in Phase 2 of the project: Insulation. We are planning to wrap the entire house in external wall insulation, so the Virginia Creeper had to go. We had the help from our friends who came to stay, and who all got really motivated when they heard we were going to burn it all afterwards. Boys will be boys, whether they’re 45 or 8.

The Westacre Adventure – how you can get involved

It’s Earth Day today. One day every year, millions of people all around the world get together to raise awareness of environmental issues. This year, the emphasis is on the effects of climate change already visible around the world.

At Westacre, we are building a home and a way of life that uses a minimum of resources and is as self-sufficient as we can make it. Our vision is to create a place of peace and beauty where we can live lightly on the Earth.

Our garden was once a fruit orchard, which retains many of the old apple and damson trees. Right now, everything is bursting into life. We have primroses, cowslips and lungwort, and the damson trees are just about to come into flower.

Westacre’s cowslips in bloom

We would love to share this beautiful place with you. If you support our aim of living more lightly on the Earth and reducing our contribution to climate change, there are things you can do to help us.

1) Share our posts
We aim to reach as many people as possible, so that others can learn from what we are doing and get inspired to start their own projects, large or small. You can help us do that by retweeting, sharing, or linking to any interesting post you see.

2) Tell us about your own efforts
Share your own adventures in working for the good of the Earth, great or small. Comment on our blog posts or on the Westacre Facebook page, or tag us in a tweet. The more conversations we can generate, the more people will hear about us.

3) Come and pitch in
We’ll welcome you with open arms at Westacre.  We’d be grateful for any help you can give us, from mowing the lawn to helping us remodel the roof. There’s always plenty to do.  And there is plenty of time to just hang out, or explore the surrounding countryside.

Rather than being just two people doing an ambitious renovation project, we’d like to grow a community of people supporting each other to do the right thing for our planet. Do you fancy coming along for the ride?

Preparing for a future of discontinuities

Climate change is happening. And we have already done so much damage that it is going to get worse. At the same time, the production of cheap fossil fuels is past its peak. That much is a given.

At Westacre, we are attempting to build a life that significantly reduces our impact on the environment and cushions us from some of the inevitable changes ahead.

This week I was reading this:
“The peak of conventional petroleum production, by an interesting irony, happened in 2005, right as that report was being leaked to the press. Thus we’re at least 27 years too late, and the massive discontinuities are already baked into the cake. Individuals, families, and communities can still take constructive steps to prepare for those discontinuities and get through them with as little suffering as possible, but one way or another it’s going to be a very rough road down from the peak.”
John Michael Greer

And this:
The impossibility of sustaining this system of endless, pointless consumption without the continued erosion of the living planet and the future prospects of humankind, is the conversation we will not have.”
George Monbiot

A few years ago, the UK government commissioned a report on climate change. It said that the ice on Greenland will inevitably melt, causing a 7m sea level rise. Unable to find maps that show you what that looks like, Alex made Flood Maps. That’s just one of those discontinuities. Where is your house on that map.

Our plans for Westacre are quite ambitious, and we are fortunate to have the luxury to be able to do this. As we renovate the house, we’ll be showing you all the elements of our low-carbon house and how they fit together. In the long run, we aim to show the world that it is possible to live a rich and fulfilled life with a much reduced impact on the living Earth.

Not everyone will be able to do all of this. But some of the things we are doing, and have already done, are very simple:
– move to a renewable energy provider like Ecotricity or Green Energy.
– turn down the thermostat on your central heating.
– put thermostatic valves on your radiators.
– keep your main living area warm with a wood burning stove.
– install a water saving toilet.
– grow some of your own food.

Getting ready to plant potatoes

And you know what? We’re loving every minute of this life. Doing real work on the land, making real relationships with our neighbours, warming ourselves at a real fire. I’d recommend it.

What are you doing to prepare for a future of discontinuities?

Giving things a second life – can you help?

Slowly but surely, we are making our home at Westacre, and Roger is settling into the bungalow in the village.

As Roger has just moved from a large 4 bedroom house to a bungalow, he has had to downsize. He has taken quite a lot of his possessions with him, but quite a few things have been left behind at Westacre.

Many pieces of furniture, books, ornaments and gadgets are now sitting in the garage, hoping to find a good new home.We are keen to start our building project, but don’t have anywhere to put tools and supplies until the garage is empty.

Just a corner of the garage

We need to go through what we’ve got and categorise it. Some of it needs to be photographed, measured and put on websites to sell. Other things would do better at a car boot sale.

We could spend a lot of time doing this ourselves, but it would go a lot faster if we had some help.

So if you are at all willing and able, please come and give us a hand. We offer you full board and lodging, if you need it, and our friendship. Plus 50% of the money you make if you manage to sell anything.

If you can help us, please do get in touch. All our contact details are here.


Moving our lives

Well, we sure have been busy. There has been substantial progress Phase 1 of our project. We finally finished Roger’s bungalow, down to the silicone sealant around the shower tray. And for the last three weeks, we have been moving two households between three houses by means of the Land Rover and a 3m long trailer. We had a deadline to meet as well, as the new tenants are moving into the house in Harrow today.

Finishing ‘the bung’ took so much longer than we had hoped. We missed all the deadlines that we ever tried to put on it. But finally, by the end of February, the last lick of paint was on and it was ready for Roger to move into.

Loading the trailer in the rain

And he has. Several trips with the Tardis and trailer moved all the furniture he needs, and 80 years of possessions and memories packed away in boxes. He is now having a happy time settling in and sorting out.

Meanwhile, Alex and Hilde have so far taken 5 trips up and down the M40 to go and fetch their own lifetime of belongings. Several boxes had already made it to Westacre, but much more had to be fetched, including all our furniture. We worked non stop for two weeks packing, carrying, loading and unloading. For the heaviest items we had help from our friend Matt, and we couldn’t have done it without him.

Less than two weeks ago, we heard that tenants had been found for us, and that they wanted to move in today, 16th March. This made our time scale a litter tighter than we had hoped. As well as all the packing and moving, we spent a day giving our empty house a once-over with fresh paint. It has been professionally cleaned and looks sparkling. Hopefully our tenants will like living there.

Today, Alex and Hilde are having a little break, and are nesting at Westacre. Alex is setting up the new telephone system, and Hilde feels the need to clean things. But we will also have time to just sit around doing not much, and for dinner with friends this evening.

Next on the list is making our bedsit in the big living room, but we’re optimistic about how much space there is. We hope to make it into four separate areas: a bedroom, a living room, a kitchen and a little office corner.

We finally are the occupiers as well as the owners of Westacre. It’s been a long haul. Now the real adventure can begin.

Heating Westacre

The problem of how exactly to provide Westacre with heating and hot water is not an easy one to solve. The main difficulty is that there are many unknowns.

Our first strategy for making the house environmentally friendly and cheap to heat is to insulate it as well as we can. We will be installing high spec windows and external wall insulation.

The trouble is that, once all that is in place, it’s hard to know how much heating we’ll actually need. How much heat will we lose on an average day? We won’t really know until we’ve tried it.

Initially, we thought we would have a wood burner with a back boiler to provide us with most of our heating and hot water. The problem with that is that either
1) you have to light fires in the boiler to get hot water, even if it’s warm in the house, and if we don’t need much heating, the room will soon get too hot.
2) you have to install a sophisticated high efficiency burner that will put 90% of its heat in to the boiler. Trouble with those is that we don’t like the sparse aesthetics of them.

In order to give ourselves the rustic looking wood burner we want, as well as a steady temperature in the house, we need to think of some alternatives.

The current idea is to have more solar hot water panels on the roof, so that most of our hot water and heating comes from that source. And for insurance against many consecutive days without sun, we’ll need a bigger heat store than we originally planned.

Heat stores work like this:

We were originally thinking of having a heat store with a 300 litre capacity. Now we’re considering 1000 litres.

These things are big. I’d even say huge. At 2.1m high and with 1.05m diametre, they take up a lot of space.

So where in the house can we lose one of those?

The thinking continues.