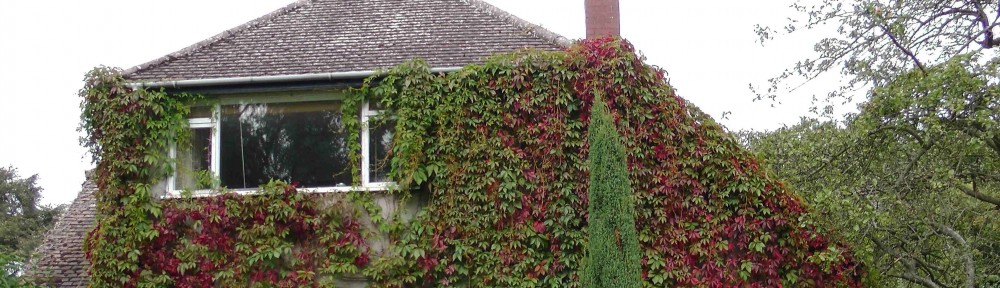
At long last, the construction of our raised vegetable bed is finished. It has been quite a process. It’s looking very smart, and we are confident that it will stand up to the pressure of the large volume of earth we are putting into it.
We built this bed for a number of reasons:
1. We needed a place to grow vegetables in the sunniest part of our property.
The finished bed
2. Delicate vegetables needed to be grown closer to the house, so we can keep an eye on them.
3. We need somewhere to put the earth that we’re digging out in order to insulate the foundations of the house.
The solution is a large, tall vegetable bed by the south wall of the house.
We started the process back in November, digging and concreting in the foundations. The wet winter turned those into a moat, and we had to wait for the dryer spring to continue with the breeze block and brick base.
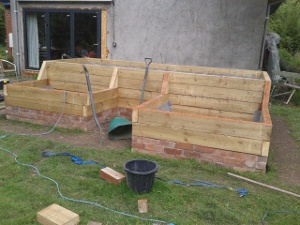
Last week, we built the wooden superstructure out of 6×4 pieces of pine. They are held together with vertical dowels made out of steel reinforcement bars. This is how we did it:
1. Cut dowels out of rebar.
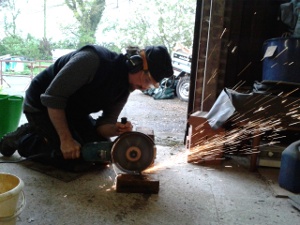
Sparks flying
We cut 10 cm pieces with a large angle grinder. This process stretches the metal and makes sharp flanges on the ends of the dowels. We filed those off with the small angle grinder. The sparks made this quite a fun job.
2. Cut the wood to size.
We cut the wood as we went along, layer by layer. Alex had a very detailed plan of how the bits of wood were going to fit together. We tried cutting them by hand, but that would have been too tiring and time consuming. The table saw is not really suited for the job, as that is designed to cut wood along its length. In the end the mitre saw did us quite nicely, though we had to turn the planks for a double cut.
3. Drill holes into the previous layer.
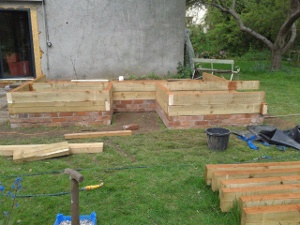
Getting taller
We drilled 5 cm holes into the brick for the dowels to fit into. A squirt of glue holds them in securely and prevents water from getting into the holes. When the dowels were inserted, we balanced the pieces of wood on top and gave them a good bash with a lump hammer. This marked the wood so we knew where to drill the holes. Sometimes, when we met a short dowel, we needed to mark the place with a sharpie.
4. Fit it together.
We dabbed each hole with a bit of wood preserving paint. Then we married up holes and dowels and hammered the planks down. When the dowels didn’t quite hit the right spot, a few taps with a hammer soon sorted that out. The pine is quite soft, so there is a bit of flexibility.
5. Corners.
The corners are, of course, quite crucial to the construction. We added a dowel in every corner, stretched some metal tape across them, and nailed them together with 6 in nails. In most places, a spiky metal crown sits around the dowels to give extra grip between the planks of wood.
6. Reinforcements.
As we are filling this construction with several cubic metres of soil, it needed some extra rigidity. Especially the wood on the long side flexed quite a a lot at first. We used some of our old floor joists and attached them to the inside along the length of the planks. A piece of OSB was then nailed to those. The gap in between is filled with rubble for drainage.
7. Drainage.
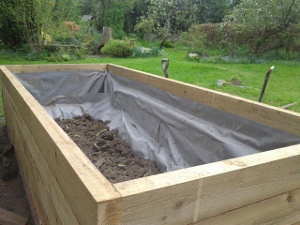
Rubble wrapped in geotextile
Such a big lump of soil also needs some good drainage. This is provided by rubble in a trench around the inside of the brick wall. We stapled geotextile to the inside of the wooden structure, running into the trench. This was then filled with rubble and wrapped around it. Geotextile lets through water but not soil. This should keep the rubble free from grit for a long time, and maintain good drainage. An added benefit is that the rubble helps spread the pressure of the soil inside the bed.
8. Fill it with soil.
As we dig out a path around the house and a trench for our insulation down to the foundations, we will have lots of soil to put in the veg bed. If we fill the smaller piers first, we may be able to plant something in those this year. I’m thinking a salad crop would be great.
Why are we insulating our foundations? Well, that’s another story. Watch this space!
Even though it was my idea, I’m a bit dubious about using rebar as dowels. I fear that they will rust away too quickly. Time will tell, I guess.